 Vignetting is any technique that reduces clarity around the corners or edges of an image. Generally, you'll see the vignette as darkened corners and edges around the center of the image. This technique has been used to draw the eye to the center of the picture where the subject will be bright and in sharp focus.
There are several ways to produce vignettes in your own images. For example, using a lens hood that is too long or too narrow for your lens will cause the hood to block some of the light in the periphery. Alternatively, using a lens that is too small for your sensor can produce the same result. There is, however, a vastly easier (and reversible) way to enhance your images with a vignette if you have the right tools.
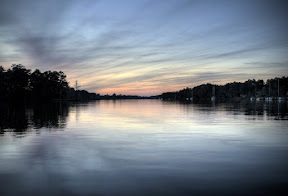
Demonstration
But, before we get into that, why don't we take a look at a few demos? Both of these images have been enhanced with a vignette. To see the original picture, just hover over the image with your mouse cursor.


How to Add Your Own Vignette
I've tried this with a number of tools including two free image editing packages called gimp and Paint.Net (to be sure, there will be future blog posts about both of these). But, for now . . . the popular one is the very expensive Adobe Photoshop.Here's how you do it:
- Open your image
- Create a new layer (Ctrl + Alt + Shift + N)
- Fill with white (Shift + Backspace)
- Set blend mode to multiply (Alt + Shift + M)
- Select Filter >> Distort >> Lens Correction
- Look at the vignette section and play with the settings in there
- Press Ok
That's it!
No comments:
Post a Comment