 Have you ever taken a photo of a particularly stunning sunset or vibrant autumn leaves only to get home and find that the colors are just not quite as bright as you remember them? Well, there's a good reason for that.
Without being too technical, the primary colors of light are red, green, and blue (as opposed to the primary colors of pigment which are cyan, magenta, and yellow). Thus, your color TV, your laptop's LCD, and the HD Jumbotron at Auburn University's Jordan-Hare stadium (war eagle) all use red, green, and blue lights to display any color they want.
So, it stands to reason that when your camera's CCD gathers raw data in red, green, and blue channels that your camera would store the data in RGB format. The problem is, though, that your brain is a little more complicated than this. Your brain adds expectations based on light, shadows, and past experience. So, when your pictures don't look like you remember, that's because the camera doesn't know what your brain said it should look like.
There's an App for That
The good news is that this problem was solved way back in 1931 when the International Commission on Illumination came up with the CIE 1931 color space. This color space has been expounded upon through decades of experimentation and is now generally called Lab (the L stands for lightness; a and b stand for two color-opponent dimensions (long story). This color space was designed to mimic the color distributions of human perception.What does this mean for you? Well, simply put, you can easily adjust your images using a curves adjustment layer in Photoshop. Before I show you how, let me show you a few samples.
Demonstration
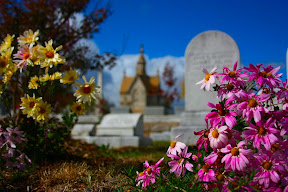
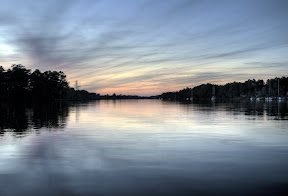
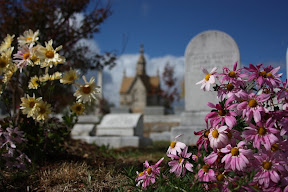
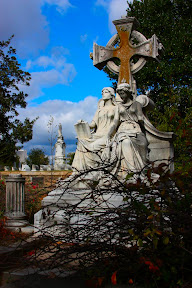
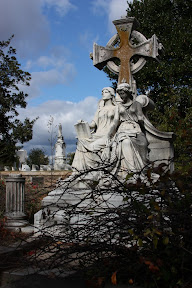
These images have been color enhanced leveraging the Lab color space. To see the original picture, just hover over the image with your mouse cursor.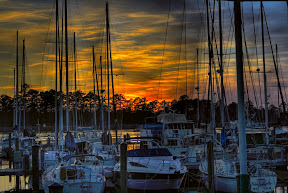


Using Lab Color Curve Adjustment
You can make Lab adjustments with gimp and there's a Paint.Net plugin too. I may publish instructions for these applications if more people start using them, but here's how you do it in Photoshop.Here's how you do it:
- Open your image
- Click Image >> Mode >> Lab Color
- Click Layer >> New Adjustment Layer >> Curves
- Name your layer and click OK
- Adjust the curve for channel a
- Drag the top right corner in one quarter of the way
- Drag the bottom left corner in one quarter of the way
- If you did it right, the window will look like this:
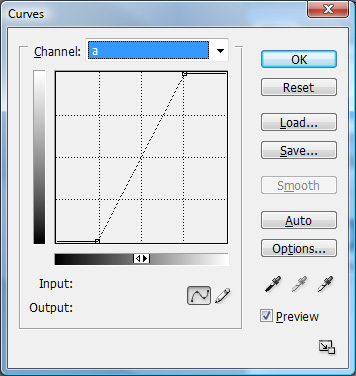
- Repeat the process for channel b
- Press Ok
- Click Image >> Mode >> RGB to convert it back to RGB color so you can save it
No comments:
Post a Comment